Tuesday 16 April 2013

Magdelena Bores

Magdelena Bores


“The Seventh Bay”
ABC video:
·       Gippsland Art Gallery
·       Figure in domestic environment
·       Imagery or real spaces
·       1 year in production

Installation artist (2 years on each), photos + building, 100,000 pieces
·       Seventh day  (Sunday)
·       5 series on website

·       Natural and artificial lighting
·       Two shadows on the wall behind person, suggests lashes or two light sources

Build up light sources in your work:
Diffusion, light, colour change

Tracing paper to diffuse light i.e. on lamp
·       In portraiture, you want diffused light

Crowded:
·       Loses its meaning
·       Where’s the focus, confusion and distraction
·       Think about content

Apostles, comments on natural features
Bungle Bungles, mountains

Lighting on newspapers: what if they are digitally made, but are made life size, information acts as a spoiler, takes something away

If you make an effort to make a model, make it look like a model, not like it’s been photo-shopped

Artificial light:
White light, neutral and colour balanced, flesh tones look real

Natural light, whites are white

Format changes: long time to do the images

Great difference in subject matter:
·       Consistency and continuity
·       Work as a series
·       Lack of obvious common theme … domestic scale
·       Perspective has changed

Concern for human beings and how they operate in domestic spaces


Further Research:

"Magdalena creates works of art from everyday items and materials in everyday settings. Photos are staged,  “using a domestic space to create something fantastical” http://www.magdalenabors.com/#!about/ccj1

She leaves the question of whether the scenes are imaginary or real, the scenes appear realistic to a point and then they become questionable… This is a concept I would like to use in my work. The image looks realistic but when you look closer something is not quite right or normal...
 
Looking through her collections, some of my favourite works by her are shown below:
I think both are quirky and brainstorming ideas for my final assignment, one theme I had in mind was Alice in Wonderland. I think these images are a quriky and fascinating! I like the use of normal scenes with weird things/objects happening or appearing, like they come out of nowhere!!


Jungle l 2010 l Pigment Print l 165x110cm


Woodland Scene l 2006 l Pigment Print l 70x70cm


Week 6 Exercises:


Week 6 Exercises: 


Photoshop has standard Auto Corrections such as:
Image: Auto colour, Auto tone, Auto contrast


Using 1_slovenian_river.jpg:


Image is under exposed 
    - using the histogram we can see this...


Use Auto Colour
  • Calm, beautiful, peaceful
  • Warmer image


- Still under exposure


Areas of high contrast:  Purple fringing at edges shown below:


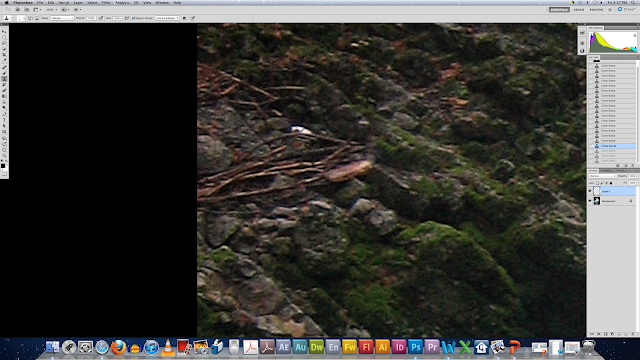
CLONE STAMP TOOL
·       Size and hardness of brush
·       Blend modes
·       Opacity
·       Pens/pencils used with tablets
·       Drop down menu, current layer


Hold option key
·       Sample rocks to cover other rubbish


You’ll see patterns of landscape if you look at image with vigour


“Non destructive” way of doing it use:
  • layer 1 (copy)
  • Different size brushes


NOTE: GARBAGE is in the image (top left)


Final Image: 


Using 2_hound.jpg:


Clone Tool:
·       Window, clone sources
·       Change opacity
·       Change brush size
·       Change hardness


Final Image: 


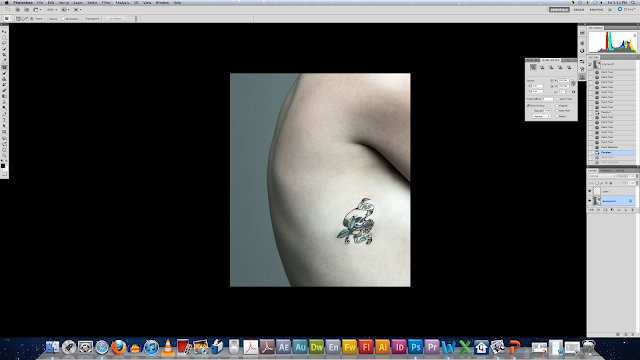
Using 3_tattoo.tif:


Patch Tool:
Click on selection and move it, heal if necessary


Final Image: 


Using 4_wellknownfolk.jpg: 


Use any/some/all the tools learnt above: 


left: 4_wellknownfolk.jpg before 
right: my editing (unfinished)


These techniques are so cool! I love the clone stamp tool! I think once you get the hang of using them they are going to be very useful tools to use in my own work! Everytime I look at these images I am amazed that I did them! I know they aren't perfect but the techniques and tools are so clever! 


DIGITAL MANIPULATION IN NEWS
·       Different perspectives
·       Darker shadows, no feathering
·       Repeated areas physically highlighted


CJ showed us a photograph on the internet/news website which looked at this kind of digital manipulation in the media:
The Atlantic: In focus... "Is the North Korean hovercraft, landing photo faked?"


LECTURE 12/04/2013

LECTURE NOTES 12/04/2013

Class Presentation: Urban Landscape 

Presented by: Cameron


Urban landscape:


  • Different generations of buildings
  • Urban photography gritty, not always pretty + quite abstract

Mark Bury
  • Buildings under construction

“Night Incursion” by Mugley
“Fruit Stand” by Vince Alongi
“Over the Footbridge” by Stephanie Krishon

Perspective
Interesting patterns
Contrast, nature +manmade structure (compare, history, potential of one)

  • Fallen buildings = structure of rubble … looks like it’s been through a lot
  • Construction (contrast) …….how it’s going to look, structural


Class Presentation: Alex Prager 
Presented by: Adam


Alex Prager: American
  • Personality + interest into series
  • Vintage clothing, Alfred Hitchcock
  • Digital photographer + filmmaker
 
Cinematic style “Rachel and Friends”
  • Snapshot from film (old school)
  • Lighting
  • Colour saturation
  • Intricate set + costume design
  • Series focusses on individual women
  • Selective lighting …. Choses what she shows ….portion of car “Cindy”

“Susie + Friends”
  • Movement, steam
  • Stills from ‘50’s, ‘60’s and ‘70’s
“Cathy”

“Su Valley + Eye #3”
  • Before, during and after … what happens...
“Irene”
  • Control of water                                                                                
  • Lighting layers   ……inside car, outside car, in store

CJ: culturally ambiguous, story is ambiguous; movement is between something, still the moment, to then ponder


Tracey Motrach:
  • Action in film i.e. Gunshot


Class Presentation: Emmanuel Correia  
Presented by: Helen


Emmanuel Correia 
  • Architecture agency as graphic designer +photographer
  • Landscape photography, presence of nature without man
  • Recent works: portraits +architecture
  • She prefers landscape photography
 
    Waterscape Collection
   “End of Line of Defence” 2006
  •      Focusses on central image not whole image
   2nd Waterscape “Little Rocks on the Lake”
  •      Vastness of nature

“Calming + Serene"
  • Darker from one end to the other
  • Simple things hold beauty
    “In Deep”
 
  •      Colour is effective, soft and calm
  •      Reminiscent of dreams you’d never want to wake up from
  •      Simplicity, relaxation
  •      Realistic but have element of haze

Selective focus
  • "The Alps", mountains look smaller
    No ripples                                                                                   
  •      MOOD, MEMORIES, SIMPLICITY
  •      Shutter speed slower, longer exposure
  •      back and forth tide, long exposure smooths water and ripples
    Mark McKenna:
  •     English, uses the above technique


Monday 15 April 2013

Week 5 Exercises: Stitching For Panorama

Week 5: Panorama demonstration; outdoor shoot; stitching principles & techniques; ‘the happy accident’


Stitching For Panorama:

Using Prospect Hill.tif:

File, Automate, Photomerge:


Merge Layers:


Crop:


Or: Use Magic Wand Tool:

Click on the transparent section, edit, fill:


Obviously there will be spots that don't line up or don't stitch:


Final Image:


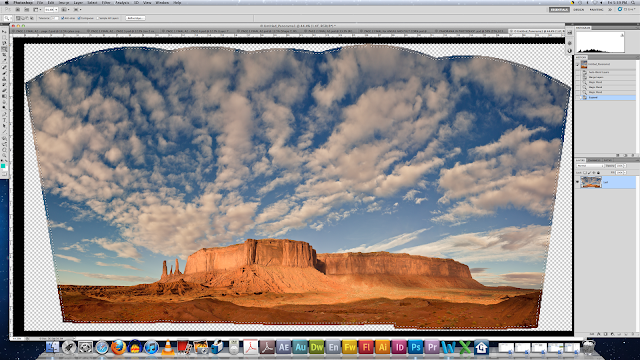
Using Arizona.tif:

File, Automate, Photomerge:


Magic wand tool:


Click on the transparent section:

Select, modify, expand:


 Experiment ie. 10:


Continue experimenting: 


Right hand corner, to the bottom, it has repeated the spiky parts of the landscape in the far right ( technology isn't prefect):

Final Image:


360o Degrees Image:

Using Park_Panorama.tif:

Open File:

Image, image size
untick constrain proportions
make height and width the same:

Image, image rotation, 180o

Filter, distort
Polar coordinates:


THEN:
  • Healing brush tool (7th down)
  • Hold option key and heal


Final Image: (unfinished, needs healing brush tool)


These techniques for stitching together panoramas are awesome!! I assumed we'd have to sit there and put them all together ourselves! Technology is a wonderful thing, and it's great to experiment with the results from the Photomerge! It saves you time rather than doing it yourself, so you can get on with the editing and other skills used to enhance the photograph.